Uninstalling Updates on iPhone: A Comprehensive Guide
Regular updates released for iPhone devices bring new features and enhancements to the iOS operating system.
While these updates are essential for improving the overall performance and security of your device, there may be instances when you encounter compatibility issues, experience performance problems, or simply prefer the previous version. In such cases, uninstalling updates can be a viable solution.
This article will provide a detailed, step-by-step guide on how to uninstall updates on your iPhone.
Table Of Contents
Why Would You Want to Uninstall Updates on iPhone?
Before we discuss more about the process of uninstalling updates on your iPhone, let us clarify the basics first. What are some reasons you might want to uninstall the updates in the first place?
Well, we have sorted out the top three reasons why:
- Compatibility issues
The most common reason why you might want to uninstall the updates on your iPhone is due to compatibility issues. If you notice that the update is slowing down your iPhone or you are experiencing issues with running certain applications due to compatibility, that’s one of the most potent reasons why you’d want to uninstall the updates.
- Performance problems
We touched base with this briefly in the previous section. Sometimes, installing updates on your iPhone can make the device experience issues with performance. You might notice an increase in the way your iPhone is slowing down or glitching. This indicates that the update isn’t contributing to the optimal performance of the device and needs a refresh.
- Previous update was better
There are times when we are so excited about a new iOS update only to be disappointed in the end. Well, if you are experiencing something similar, we’d recommend that you consider uninstalling the new update. In some cases, people chase familiarity with the devices they are using. So, when we update to a new version, what it does is lead to issues and make us not like the device we are using.
Understanding the reason why you’d want to uninstall the new software update on your iPhone is crucial before you uninstall the software update.
Factors to Keep in Mind Before Uninstalling the Software Update on iPhone
So, you are dead set on uninstalling the latest iOS update and upgrading to a new version. Well, you aren’t the only person in a similar predicament. Thousands and millions of iPhone users try to uninstall the newly updated software.
But, before you do that, you must keep certain factors in mind:
- Back up your data
This goes without saying that if you are uninstalling your iOS update, there are chances that it might reset your device. In that case, there are heavy chances that you might end up losing all the saved data on your device. This is one of the reasons why you must back up your data before you uninstall the update on your iPhone.
- Checking the current iOS version
Sometimes, it is common to get confused with the iOS update you have on your iPhone and end up uninstalling the wrong update. We also fail to realize the true potential of the present iOS update and end up uninstalling it because it seems foreign. Well, we’d recommend that you take your time with the update before you reach any conclusions.
- Check the release notes
So, you have uninstalled the new iOS update and you are pretty happy with the way things are in the device. However, we’d recommend that you always read the release notes of the new iOS update and familiarize yourself. Reading the release notes will give you insight into the changes and improvements made, as well as any known issues or bug fixes.
Once you have these elements sorted and looked after, let us walk you through the actual uninstalling process.
Uninstalling Updates on your iPhone
The process of uninstalling the updates on your iPhone isn’t as complicated as you think. If you follow the steps as mentioned, you should be pretty good to sort things out as you go.
Here’s what you need to do:
- Open your iPhone and navigate to the Settings menu.
- Scroll down to General.
- Select “Software Update” from the General menu.
- You will find a list of available updates and information about the currently installed version.
- Tap on “Installed Software” to view the updates that you have installed on your iPhone.
- Choose the specific update you wish to uninstall.
- Before proceeding with the uninstallation, the system will prompt you with details about the selected update.
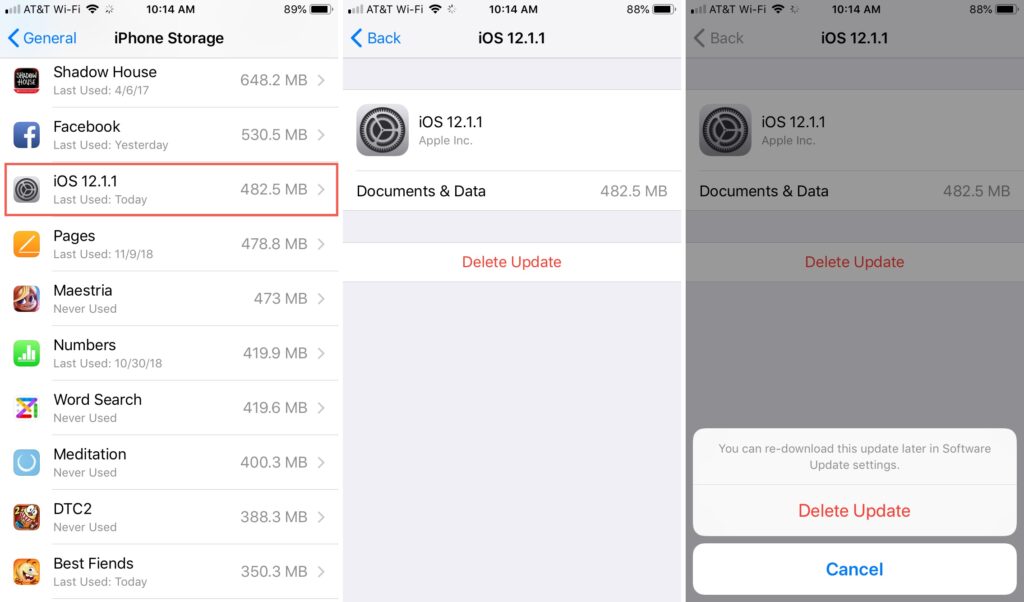
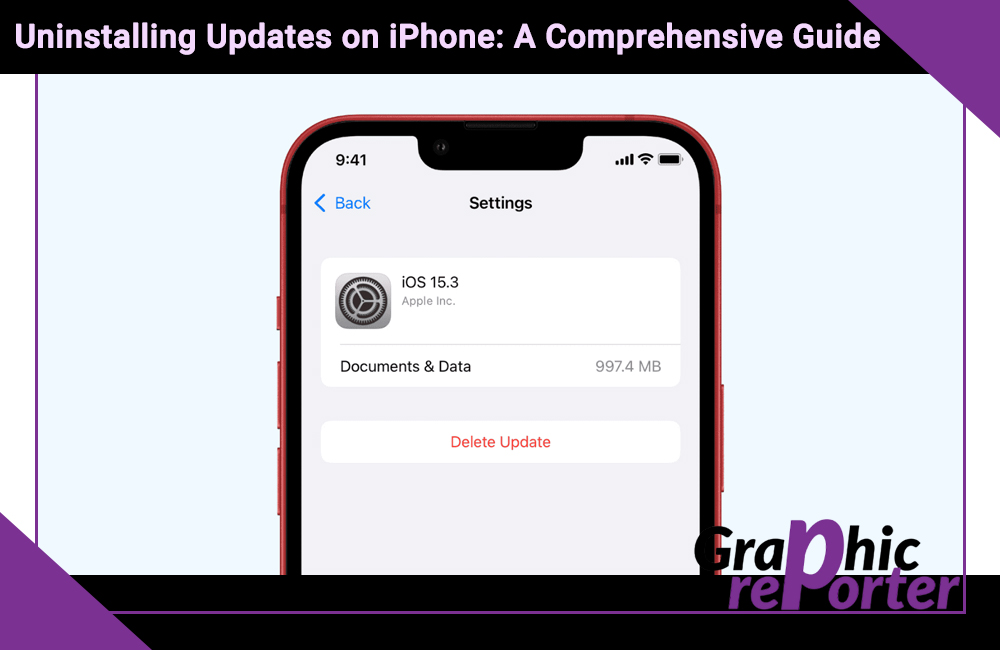
- Tap on “Delete Update” to confirm the uninstallation of the update.
- To ensure the security of your device, enter your passcode or use Face ID/Touch ID when prompted.
Once the uninstallation process is done, the last step you need to do is restart your iPhone and then see if the uninstallation has been done successfully.
How to Deal with Unwanted Update Notifications?
If you don’t want to be bombarded with persistent software update notifications on your iPhone, there is an easy way to stop that.
Ideally, you can:
- Disable the automatic updates option to ensure that no updates are happening that you don’t want or approve of.
- You can also clear the updated storage to ensure that you can use the device at your convenience.
If you wish to revert to an older version of the iOS update, there are a few different ways you can do that. However, keep in mind that these steps aren’t as simple and direct. You’d need a PC to be able to revert to the previous version, which can be a little troubling, especially for people that aren’t tech-savvy.
Conclusion
Uninstalling updates on your iPhone isn’t as complicated as you think. If you are not satisfied with the current iOS version and want to overcome the laggy performance, we hope this article gives you all the details you are looking for. Always stay informed about the latest iOS updates and user feedback to make informed decisions about updating or uninstalling software on your iPhone.

