Cancel AppleCare+ Subscription from Apple (iPhone, Mac)– Step-by-Step Guide

If you are one of those people that has a habit of dropping or damaging their Apple devices more than you’d like to admit, you aren’t the only person. This is where the benefits of Apple Care+ come into play.
The main significance of this subscription is that it extends your warranty and provides you with additional support, both for your iPhone and your Mac. However, there could be multiple instances where you wish to cancel your AppleCare+ subscription.
If you are considering something similar, we have all the insights for you. This article will walk you through all the important insights that you need to know about canceling the subscription directly from your devices.
Table Of Contents
What is the AppleCare+ Subscription?
Before we walk you through the steps to cancel your AppleCare+ subscription, let us familiarize you with the basics first.
AppleCare+ is Apple’s extended warranty program, wherein the users get access to additional warranty to cover accidental damage and get technical support from the company’s service centers without needing to worry about paying anything out of pocket.
The subscription lasts for two extra years after the original warranty on the product is over. Now, coming to the price, it will depend on the country you are getting the subscription from.
Why Would One Want to Cancel AppleCare+ Subscription?
There could be multiple reasons why one might want to cancel their AppleCare+ subscription and opt for something else in the meantime.
Here are a few worth looking into:
- Upgrade to a new device: If you plan to upgrade your iPhone or Mac to the latest model and no longer need the extended warranty for your current device, canceling AppleCare+ is a sensible decision.
- Not being able to afford: In some cases, financial constraints may prompt users to discontinue their AppleCare+ subscription to save on costs.
- Have a better coverage plan and service: If you have opted for third-party insurance or warranty coverage for your Apple device, you might want to cancel AppleCare+ to avoid overlapping benefits.
There could be other reasons too, varying from one Apple user to the other. Irrespective of the constraints or the reasons why you want to cancel your AppleCare+ subscription, knowing the right steps is key.
Cancelling AppleCare+ on iPhone
If you want to cancel your AppleCare+ subscription on your iPhone, the steps are fairly simple, provided you aren’t missing out on any of the steps mentioned down below:
- Unlock your iPhone and navigate to the “Settings” app from the home screen.
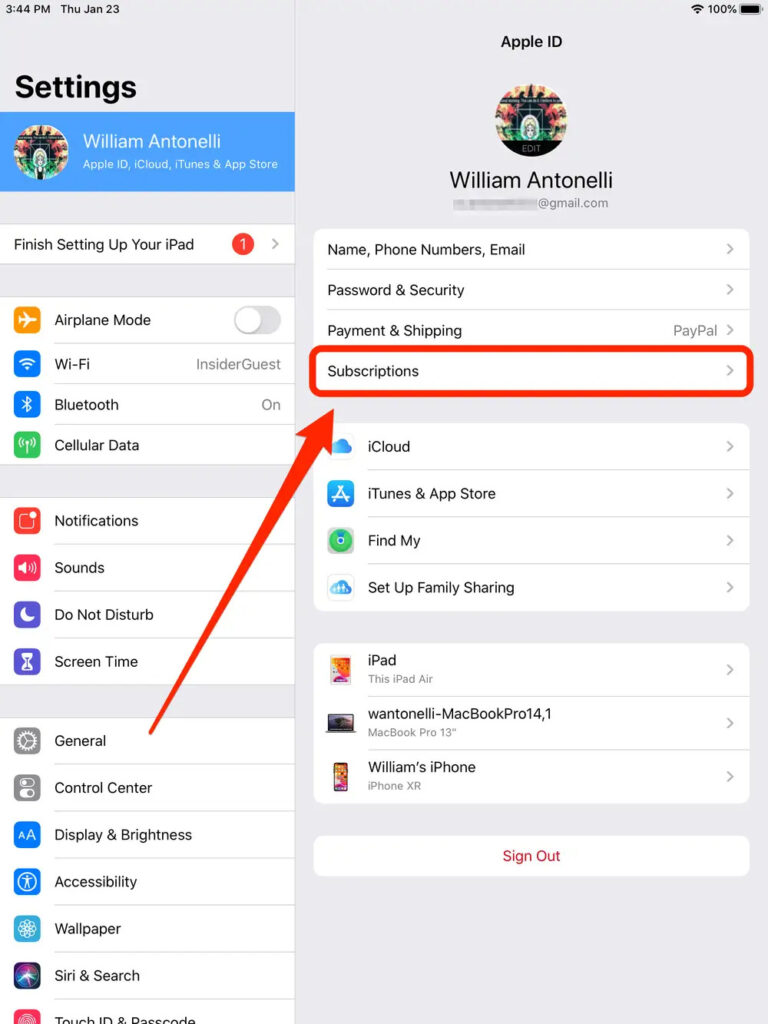
- Once in Settings, tap on your Apple ID, located at the top of the screen.
- In the Apple ID menu, find and select the “Subscriptions” option. Manage AppleCare+ Subscription: You will see a list of active subscriptions associated with your Apple ID. Locate and tap on the “AppleCare+ Subscription.”
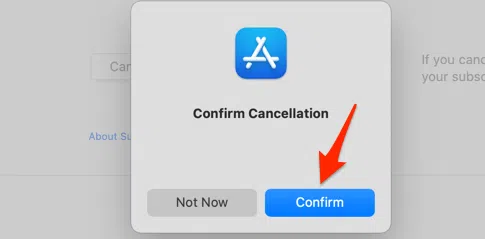
- Tap on “Cancel Subscription,” and then confirm your action when prompted. Your AppleCare+ subscription will be canceled, and you will continue to have the benefits until the current billing period ends.
The steps should be followed as mentioned and once you are done canceling the subscription, close the Settings and relaunch the app to check if it was cancelled successfully.
Cancelling AppleCare+ on Mac
Moving ahead from the iPhone, you can buy an AppleCare+ for your Mac too. If you wish to cancel the subscription for your Mac, the steps are as follows:
- Click on the Apple logo in the top-left corner of your Mac’s screen, and select “System Preferences” from the dropdown menu.
- Within the System Preferences window, locate and click on “Apple ID.”
- In the Apple ID menu, select “Media & Purchases” from the sidebar, then click on the “Manage” button next to “Subscriptions.”
- You will find a list of your active subscriptions. Look for “AppleCare+ Subscription” and click on “Edit” next to it.
- On the subscription details page, click on “Cancel Subscription” and confirm your decision.
Once successfully canceled, you will be able to use the AppleCare+ subscription benefits until the current billing period is over.
Will Cancelling AppleCare+ Immediately Terminate the Services?
Let us give you an example for better understanding. If your AppleCare+ service under the current billing period is not over and you still have one or two weeks, you’d be able to use those two weeks.
So, if you end up accidentally damaging your iPhone during these two weeks, you’d be able to get the device fixed under the AppleCare+ subscription rules and regulations, even though you have already canceled the subscription.
In short, the validity of the AppleCare+ subscription remains until you have paid for it. So, even if you cancel the subscription in the middle of the month, you’d be able to use the services until the current billing period is over.
Furthermore, if you have paid for your AppleCare+ subscription upfront and decide to cancel it before the two-year period is over, you may be eligible for a prorated refund. The refund amount will depend on the remaining duration of your subscription.
We’d recommend that you discuss the same directly with the customer service agents at Apple Care to get a comprehensive understanding of what’s the right course of action in this case.
What Happens if I Can’t Cancel my AppleCare+ Subscription?
The AppleCare+ subscription can be canceled from the Settings of either the iPhone or the Mac. However, if you are encountering issues with the process, we’d recommend that you contact the Apple team directly.
For more proactive results, take your Apple device directly to the nearby Apple Support center and have them take a look at the device and help you figure out what’s wrong and what you can do differently to fix the issue for good.
Conclusion
The need to cancel an AppleCare+ subscription can stem from multiple reasons. However, keeping the reasons aside, we hope this article gives you a rundown of the steps you need to follow. Just ensure that you will continue to benefit from the subscription until the billing period is over. Always get a clear understanding of the pros and cons and the dos and don’ts before concluding.


![How to Get TruConnect Free Tablet? In 2023 [Complete Guide]](https://graphicreporter.com/wp-content/uploads/2022/08/How-to-Get-TruConnect-Free-Tablet-Complete-Guide-768x499.jpg)


![How To Connect Xbox 360 Controller To PC Without Receiver [Step By Step]](https://graphicreporter.com/wp-content/uploads/2022/08/How-To-Connect-Xbox-360-Controller-To-PC-Without-Receiver--768x432.png)

